The Cropping Grid |

|

|
|
The Cropping Grid |
|
|
The Cropping Grid |
|
|
|
The Cropping Grid |
|
|
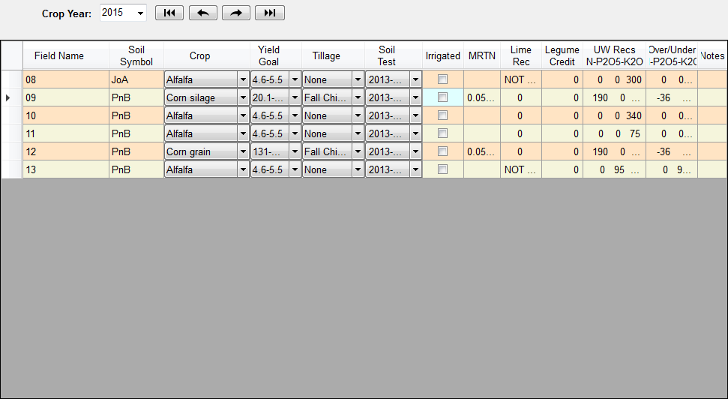
Another way to view the cropping data is by going to the Cropping Grid. To switch between the normal Cropping screen and the Cropping Grid click on Cropping Grid Edit in the View menu or the short-cut ![]() . When the Cropping Grid is enabled a little check mark will appear next to this button in the menu.
. When the Cropping Grid is enabled a little check mark will appear next to this button in the menu.
The difference between the Cropping Grid and the normal Cropping screen is that the Cropping Grid displays all of the cropping information for a single year in a grid with one row per field, where the normal Cropping screen displays all of the cropping information for a single field with and individual control per year.
Helpful Tips for the Cropping Grid View:
•Clicking on a column header will sort the column first in ascending order then in descending order.
•The acres for the selected field rows is displayed above the grid. You can sort the fields by crop, for example, and select all of the fields in a crop to see the acres in that crop.
•Clicking on the cells will open dialog boxes where appropriate (similar to the Cropping screen). Use these dialog boxes to change the values in the grid. More information about each of these inputs can be found in the other help documents in this section. The biggest difference in dialog boxes is that the Nutrient Application Planner is opened by clicking on This year's manure or This year's fertilizer in the normal cropping screen, where in the Cropping Grid it is opened by clicking on Over/Under N-P2O5-K2O.
•Multi-cell editing is allowed for the crop yield goal only. This can be accomplished by selecting rows with the same crop then right mouse clicking on the Yield Goal column header cell.